Hosting static sites or applications usign Gitlab Pages
January 22, 2022 | Arunachalam ENOTE: The follwing docs assumes that you have basic knowledge about hosting, DNS and exposure towards Gitlab CI/CD. If not please refer to some of the topics avialble in the current platform to understand Gitlab CI/CD and few sample ci code available here
About Gitlab Pages
With GitLab Pages, you can publish static websites directly from a repository in GitLab.
- Use for any personal or business website.
- Use any Static Site Generator (SSG) or plain HTML.
- Create websites for your projects, groups, or user account.
- Host your site on your own GitLab instance or on GitLab.com for free.
- Connect your custom domains and TLS certificates.
- Attribute any license to your content.
To publish a website with Pages, you can use any static site generator, like Gatsby, Jekyll, Hugo, Middleman, Harp, Hexo, or Brunch. You can also publish any website written directly in plain HTML, CSS, and JavaScript.
Pages does not support dynamic server-side processing, for instance, as .php and .asp
NOTE: Above statement is a replica from Gitlab about pages for quick reference. To know more, please visit the offical documentation https://docs.gitlab.com/ee/user/project/pages/
Now with all that said, let us get started 🏁 on setting up pages for your site
Ensure that .gitlab-ci.yml file is present in the root of the repository with all the required configuration for your pipeline to execute. If not create one, based on your application need. If you do not have any prior knowledge on it please refer to the following docs to get started - .gitlab-ci.yml
We shall be settign up the pages using gitlab UI.
- On the left panel find the Settings -> Pages and navigate into it.

- Click on New Domain and add your domain name. You need to make sure to have the DNS Manager open and have full access.
- Head over to your DNS Manager and select the record type as
Aif it is the root domain and provide the corresponding value35.185.44.232in the value field. The IP Address is constant for gitlab services. If it is the sub-domain then select the record type asCNAMEand set the appropriate Host name and provide the corresponding value that is shown in the pages UI. Eg :-test.gitlab.io.Add another record in the DNS Manager for gitlab to verify the ownership of the domain. Record type to be selected asTXT, Host name to be provided as shown in the below image. Skip your root domain name at the end as it is auto added by your DNS Manager. Eg :_gitlab-pages-verification-code.And then Save the Changes here as well as under DNS Manager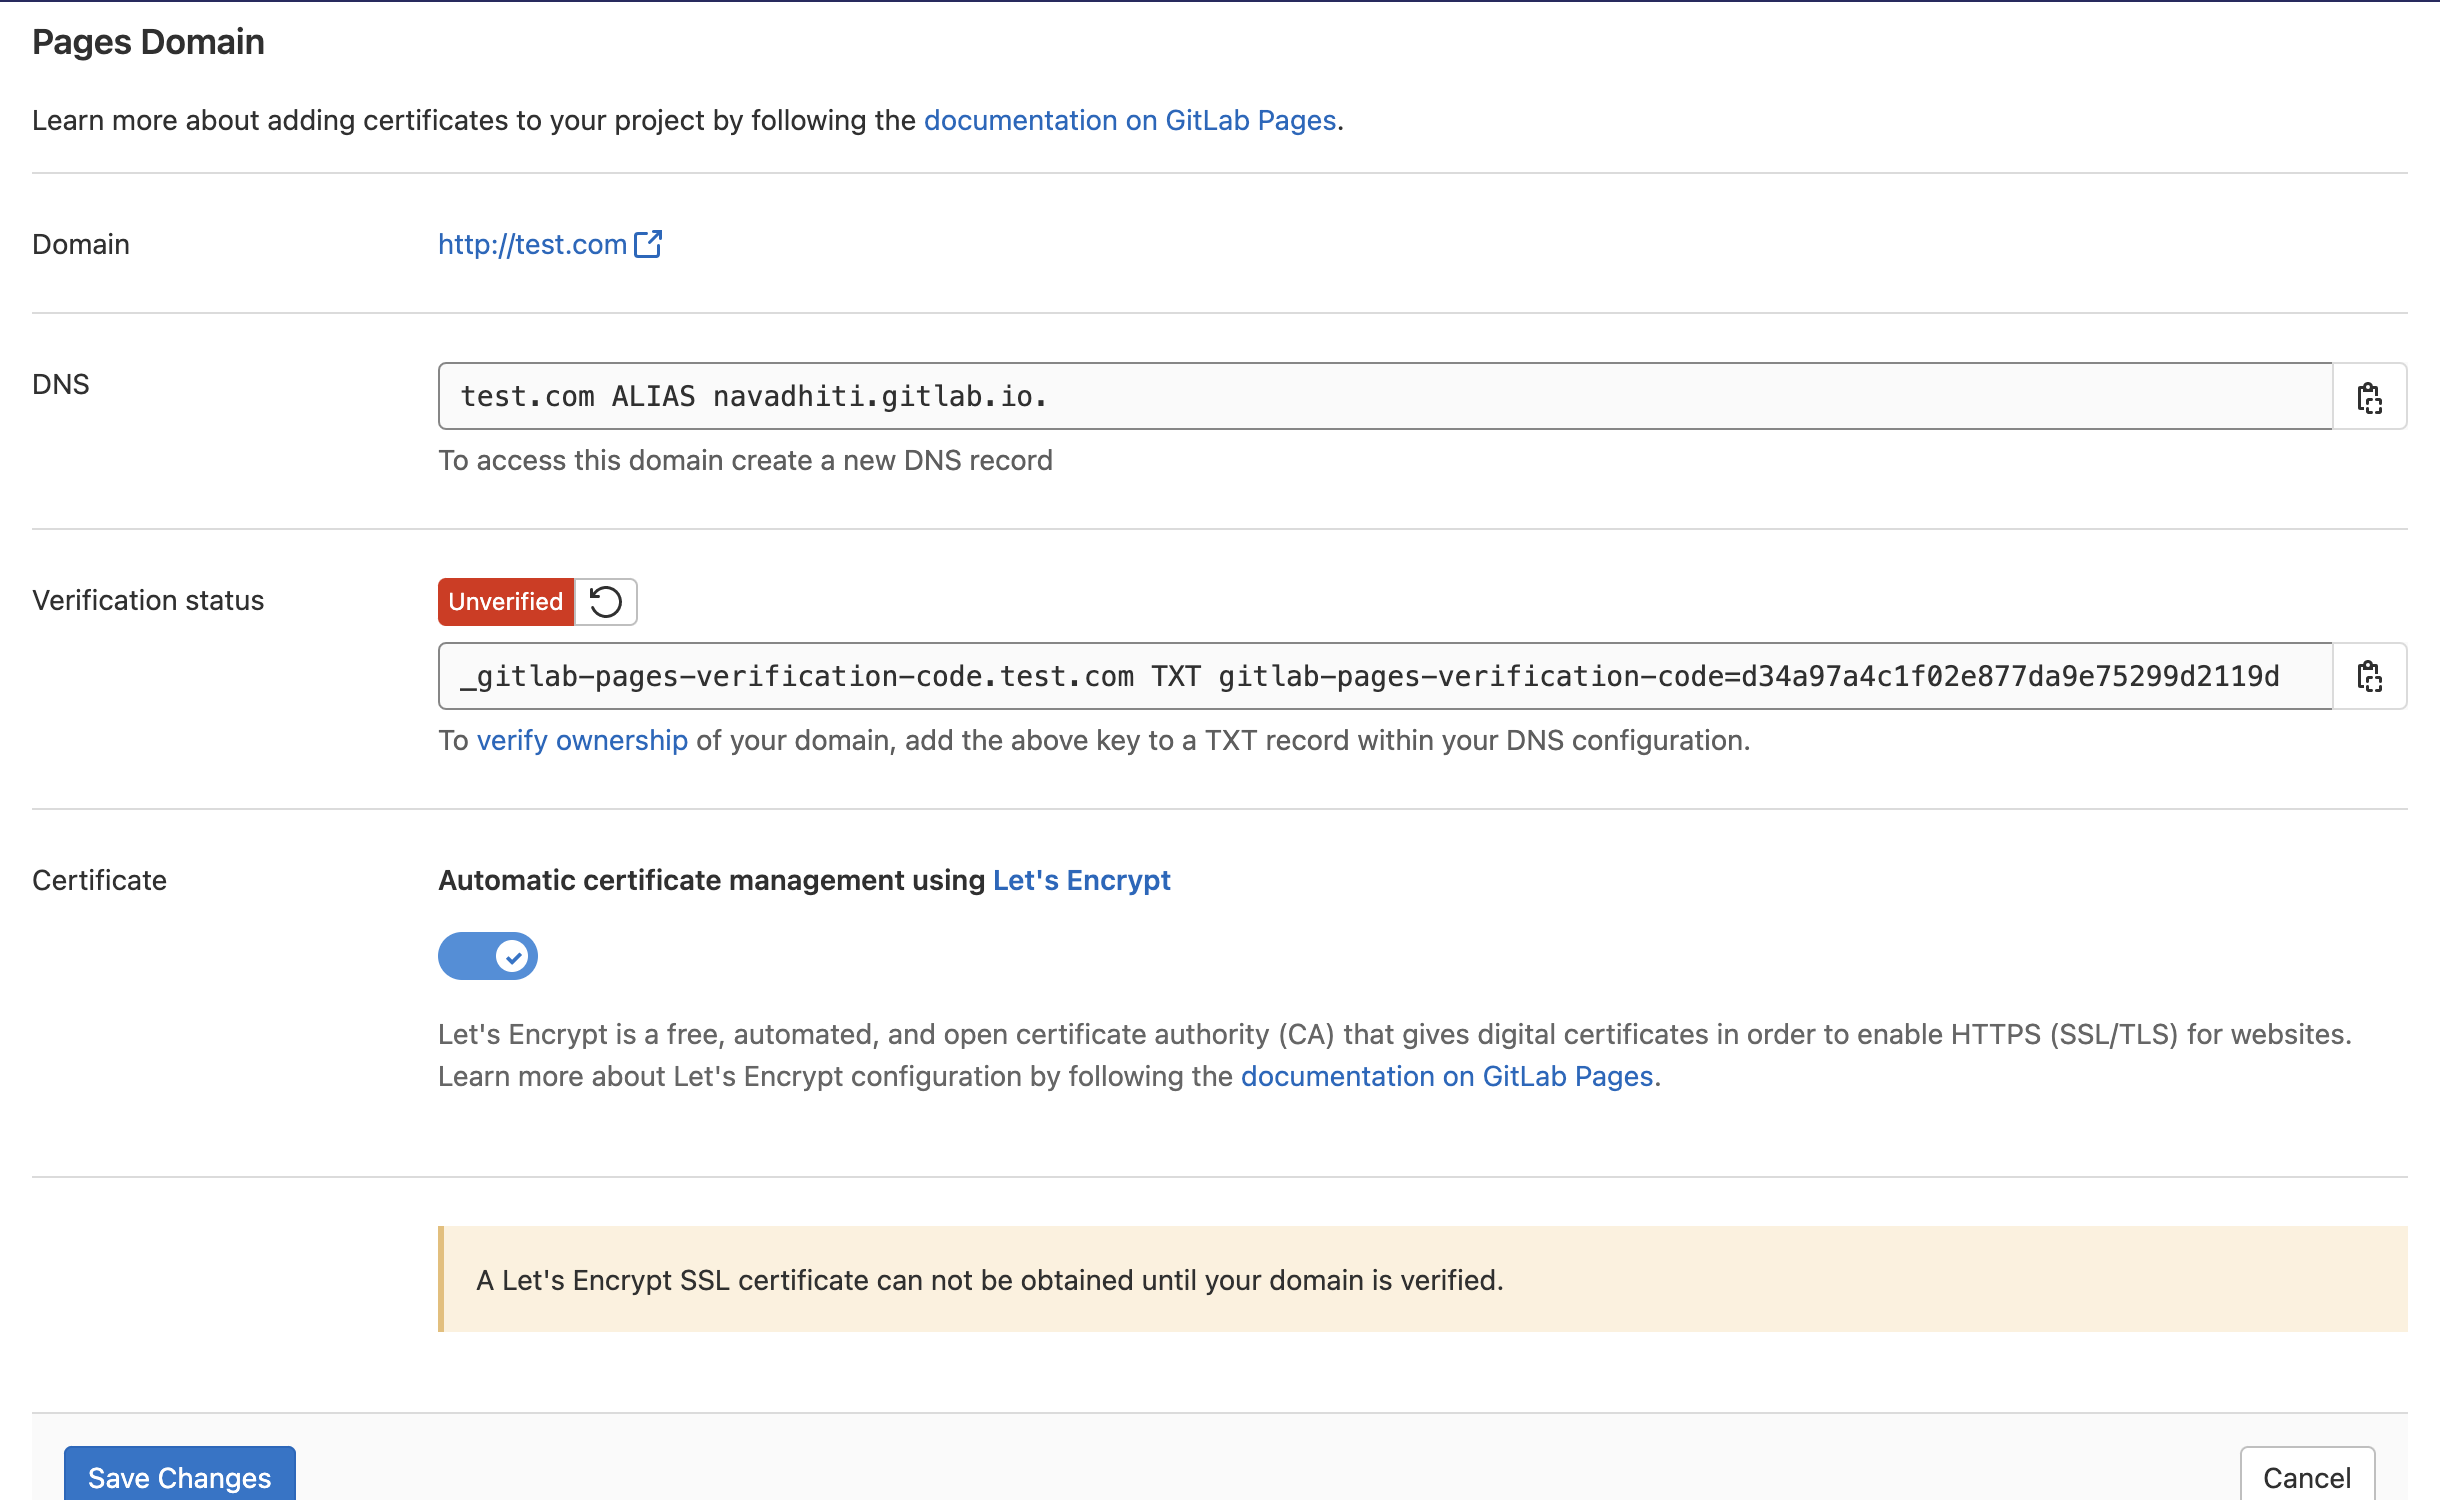
We are almost done with the setup. All that is pending right now is setting up the project visibility for the public to access the site.
Under Settings -> General we should find the UI as shown in the below image.
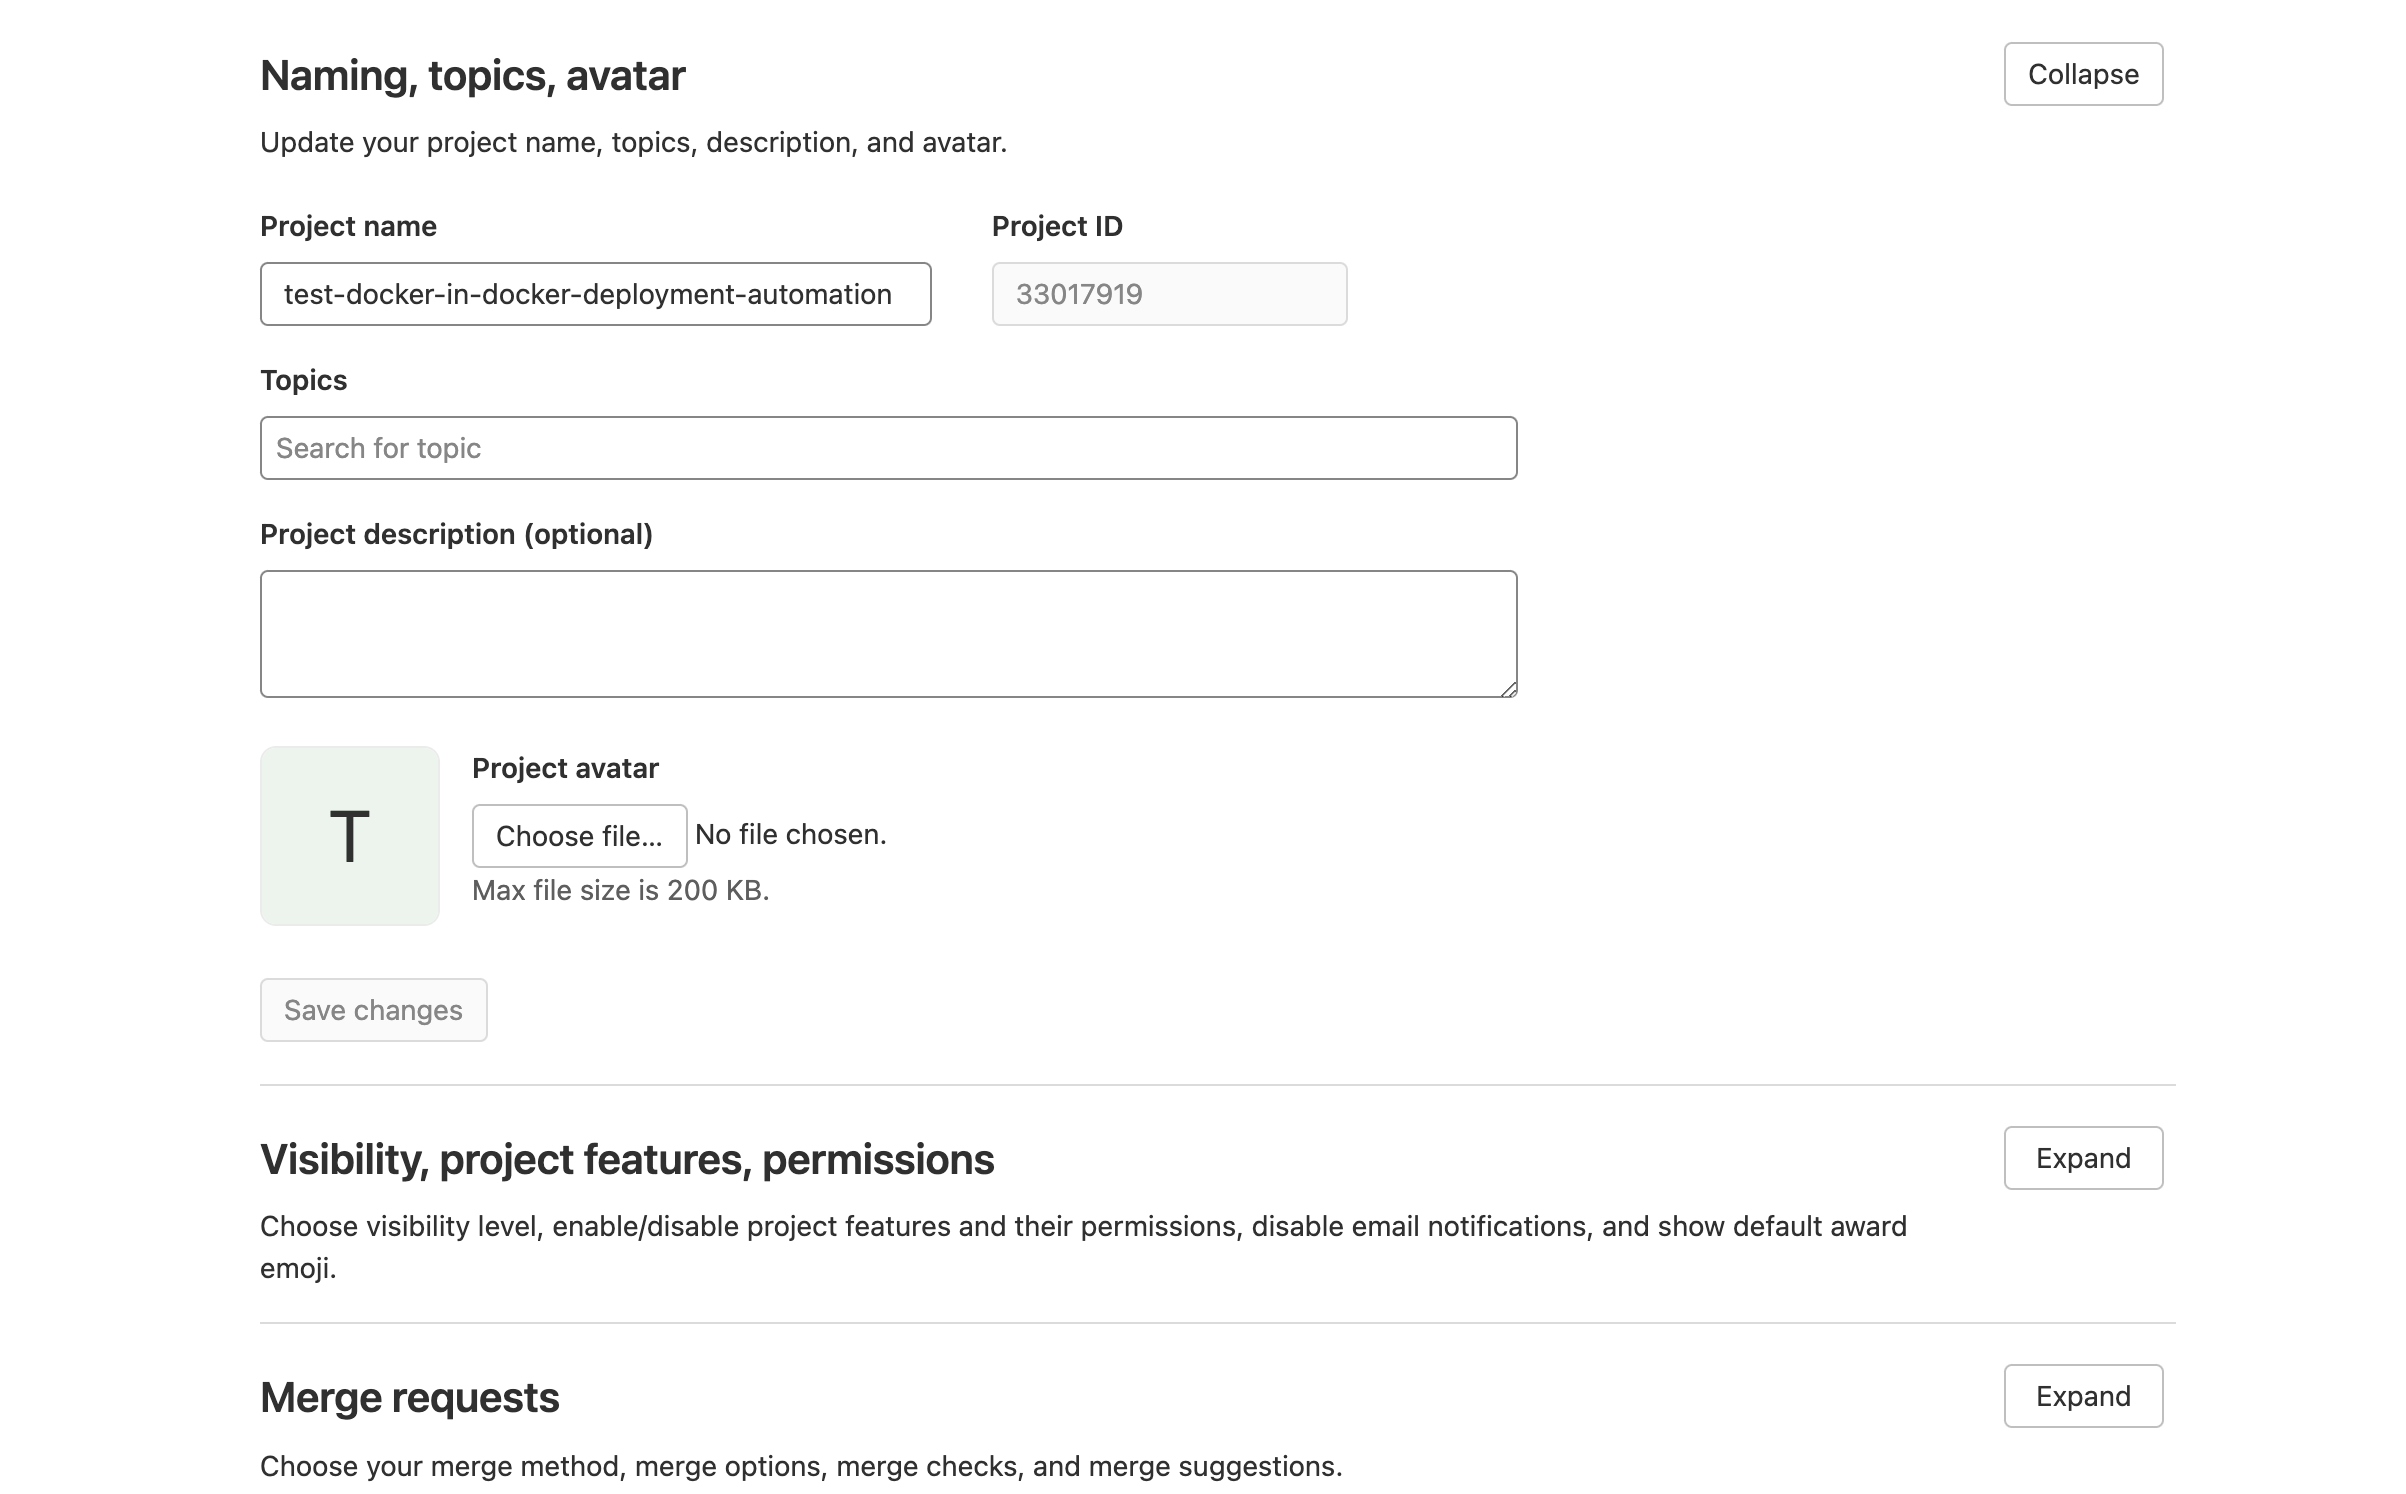
Expand the Visibility, project features, permissions section and find the Pages option. Change the value from Only Project Members to Everyone and save the changes.
Now We are all set to check out our new site with the specified domain under pages. If the domain is not secure, navigate back to the Pages section and click on edit domain. Under the edit UI we should find the Let’s Encrypt section, click on retry and save it. It might fail initially one or two times. Repeat the process until it is successful.